Solo Photography Tips: How to Take Photos of Yourself

Mastering solo photography skills comes with the territory for solo travelers who want to capture memories of their journeys. Is your travel companion impatient, unwilling or…unskilled when it comes to travel photography? Or, maybe are you a solo traveler wanting to learn how to take good Instagram photos of yourself.
I’ve been in your shoes and I’ve learned a thing or two about solo travel photography that I’m more than happy to share with you. From the moment I first started traveling, I was dissatisfied when I didn’t have enough photos of myself enjoying travel destinations.
Sure, I could snap beautiful photos of my surroundings but if that’s all I have at the end of a trip what’s the point? I may as well have ordered postcards online and stayed at home!
Solo Photography Tips: Gear

Over the years, I realized it was important to me to be able to sidestep the awkwardness and sense of reliance I felt when asking either strangers or my own travel partners to take photos of me while traveling.
Thankfully, I’ve found out and am here to share how to take good pictures of yourself so you can capture the travel memories you’ve always wanted.
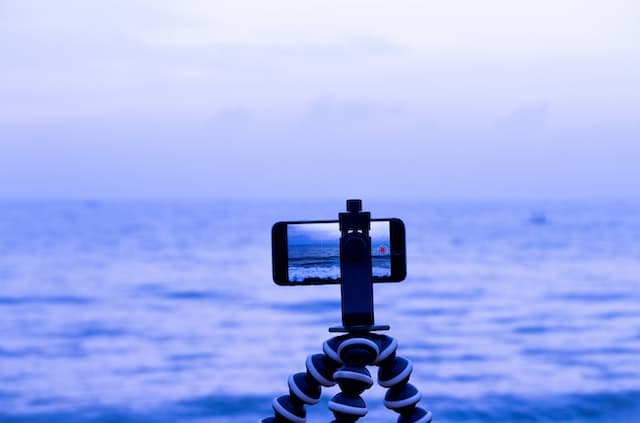
Solo Photography Using Smartphone Tripods
Let’s talk equipment. Contrary to many fellow travel bloggers, I’m still mostly using my camera phone to take photos. I’ll use a DSLR from time to time (less often now I’m divorced and the one I had access to belonged to my ex!) and I do have a desire to learn more skillful photography.
But what it comes down to is, I’m a traveler first. Even before I’m a blogger or photographer of any kind, I am a wanderlusting soul who wants the freedom to explore.
Traveling with my sleek, lightweight iPhone as my main camera affords me this freedom. So, when I was looking for a tripod I focused on smartphone tripods with bluetooth remote controls.
Now, I don’t know what kind of shopper you are but I’m the kind who reads practically every single available review, the Q&A, the photo reviews.
Everything.
It’s a time consuming way to shop and a bit stressful, but it means I usually love the purchases that make it through my obsessive rigorous standards.
The point is, you benefit from my neuroticism because if you’re looking for a smartphone tripod for taking photos of yourself you can confidently go with this one I picked out for myself.
What I like about this camera phone tripod is it’s lightweight, compact and easy to assemble / disassemble. It comes with a carrying pouch and a bluetooth remote that snaps into the tripod when not in use.
The whole setup fits easily into both my suitcase and day bags. It’s about the size of a selfie stick, for comparison, but does so much more. And, it’s under $30!
📷 Click here to get this smartphone tripod for your
solo photography needs.
Here are a couple recent shots I’ve taken with this very tripod + my iphone, from my solo trip spending 2 days in Los Angeles:

How to take photos of yourself
Here are the two foundational steps for capturing great photos of yourself as a solo traveler.
1. Set up the Shot
You have your smartphone tripod in your bag, and you’ve just come across a perfect photo opportunity. Now, you need to know how to take a good photo of yourself.
One big element of this is knowing how to set up the shot. It never hurts to be familiar with photography basics, like the rule of thirds.
Or, pre-planning photo spots / pose ideas (you can do some fun research by searching the ‘places’ tab of Instagram). But, in this post I’m going to focus on using your smartphone tripod.
First, securely fasten your phone into the clamp and then extend the tripod out. Next, work on framing your shot.
You’ll want to set it up, look at the potential shot through your camera phone, get into the potential shot yourself and snap some test shots if you’re able until you get it positioned just right.

Avoid positioning your smartphone tripod too near a ledge where it could possibly fall over, or in an area that’s so busy someone could snag it and walk away with it.
These are common sense challenges we risk as solo travelers wanting photos of ourselves no matter the scenario, so simply be smart about it.
While this tripod isn’t super flimsy, it’s still a good idea to take some precaution. If it’s a bit windy, anchor the tripod down with something.
On my LA solo trip, I used a light jacket I had with me, and even my travel bag a couple times when I was in a less trafficked area.
If you happen to be traveling with someone (who isn’t the most patient or artistic when it comes to taking photos) you can enlist their help to simply guard or hold the tripod once you’ve down the hard work of framing the shot.
2. How do you solo pose?
Once you’ve framed your shot, it’s time to add yourself in the mix and snap some good pictures of yourself to share with friends, family and followers!
Try a few different poses and facial expressions. To make the end result more natural, have the bluetooth remote hidden in your hand and click aggressively, taking multiple shots in a row.
As you do this, change your position every few seconds. You might turn your head in different directions, push back your hair, adjust your hat, twirl and so on.
Your movements don’t have to be major and you don’t have to force creative poses. Simple, natural movements can help you get a great shot.
After taking some shots, review them. Looking them over will give you more ideas of what’s working and what isn’t: where should you look? Should you smile or not? Is the lighting off where you’re standing?
Then, take a few more shots until you have at least a couple you really like.
Yes, this might feel awkward. But, not much more so than when you enlist a friend or stranger to take a photo of you in a public place.
In fact, maybe even less so because you’re in full control and can be done as quickly as you like without someone else art directing you from 10 ft away!
The lightweight equipment, quick setup and rapid photo-clicking make taking solo pics of yourself a fairly quick and painless process.
The best part is, once you’re done you can simply pack up your tripod, stick it back in your bag and continue exploring!
This affordable smartphone tripod has proven to be one of my best purchases as a solo traveler, and I’m sure you’ll love it as well.
Book a solo photo shoot

In addition to solo photography with a tripod to take photos of yourself, a solo photo shoot is a great way to capture photographic memories on your travels.
I’ve booked solo photo shoots in London and Paris so far, and plan to book more as I travel around the world. You can read about my Paris solo photo shoot experience in this solo Paris trip guide.
Final Thoughts: Solo Photography Tips
One final tip from me to you: as always, especially as a solo traveler, always be aware and respectful of your surroundings.
Don’t get so caught up in getting the perfect shot that you disregard the guidelines in place around you to keep you safe. Stay alert and have fun!